
The upgrade to the TMC 2209 with UART control on the FLSUN QQ-S Pro with the HISPEED board running Klipper Firmware (my setup) is a piece of cake. Unfortunately, I had to hunt down the information from the four corners of the internet, translate some English that was translated from Chinese into some readable English, and adapt some others' methods with updates to newer features/revisions of the various boards. I'll give credit first because the info WAS out there and all I'm doing is stitching it together, too. Here are my sources:
- CobraPi's configuration file: https://github.com/CobraPi/Klipper-Firmware-FLSUN-QQ-S-Pro-Delta-Printer/blob/main/configurations/printer_qqs(tmc2209).cfg
- Foxies Marlin guide, section 3 - SPECIAL MODS: https://github.com/Foxies-CSTL/Marlin_2.0.x/wiki/3.SPECIAL-MODS#32-tmc2209-single-wire
- Klipper Documentation: https://www.klipper3d.org/TMC_Drivers.html?h=stealth#enabling-stealthchop-mode
- Klipper Configuration Reference for the TMC2209: https://www.klipper3d.org/Config_Reference.html?h=tmc#tmc2209
- I'm including this Klipper issue because it had great diagrams and led me to the Foxies Github: https://github.com/Klipper3d/klipper/issues/3898
- BigTreeTech's v1.2 TMC 2209 Board Documentation: https://github.com/bigtreetech/BIGTREETECH-TMC2209-V1.2/blob/master/manual/TMC2209-V1.2-manual.pdf
Why TMC2209's?
- They're silent - HOLY CRAP, they are silent. The biggest change is in the sound of the extruder but overall, the steppers are nearly silent.
- They're fast - the motors now move faster and I am able to run higher speeds with accuracy and fewer artifacts that are normally attributed to speed.
- They're smooth - by applying the special features found in Trinamic's 2209 chips, the steppers operate very smooth and precise, resulting in the advantages I've already listed.
- No manual adjustments with UART mode - I'll cover that in the next section!
- Other stuff... I want to try the stall detection (sensorless homing) and the StealthChop2 features.
Why UART Mode?
When I fly my RC Helicopters, I count on my Mikado VControl system to provide me with full remote configurability of my helicopters' components as well as telemetry to tell me what's going on in-flight. It's the same way with UART mode for the steppers. Right through the console, I can get information about the steppers and the drivers. I can configure them via software and make fine adjustments. With UART mode, the entire feature set of the TMC2209 is available for configuration (enabling/disabling/parameters) without having to take the printer apart, change jumpers, solder pins, or plug in to a programmer. So, UART mode was the only way to go for me.
For those who like to just plug & play, this is not for you. Stick with some TMC2208s or 2209s in standalone mode. This mode makes them drop-in replacements.
By the way, one of the features I discovered was accessible via UART mode was the current limiting settings. Instead of having to go through the manual process of connecting a multimeter and turning the pot to get the right reference voltage, I just set it in the configuration file and I was done.
What will I need?
Here's the list of materials I used today. You can get different stuff but your mileage may vary...
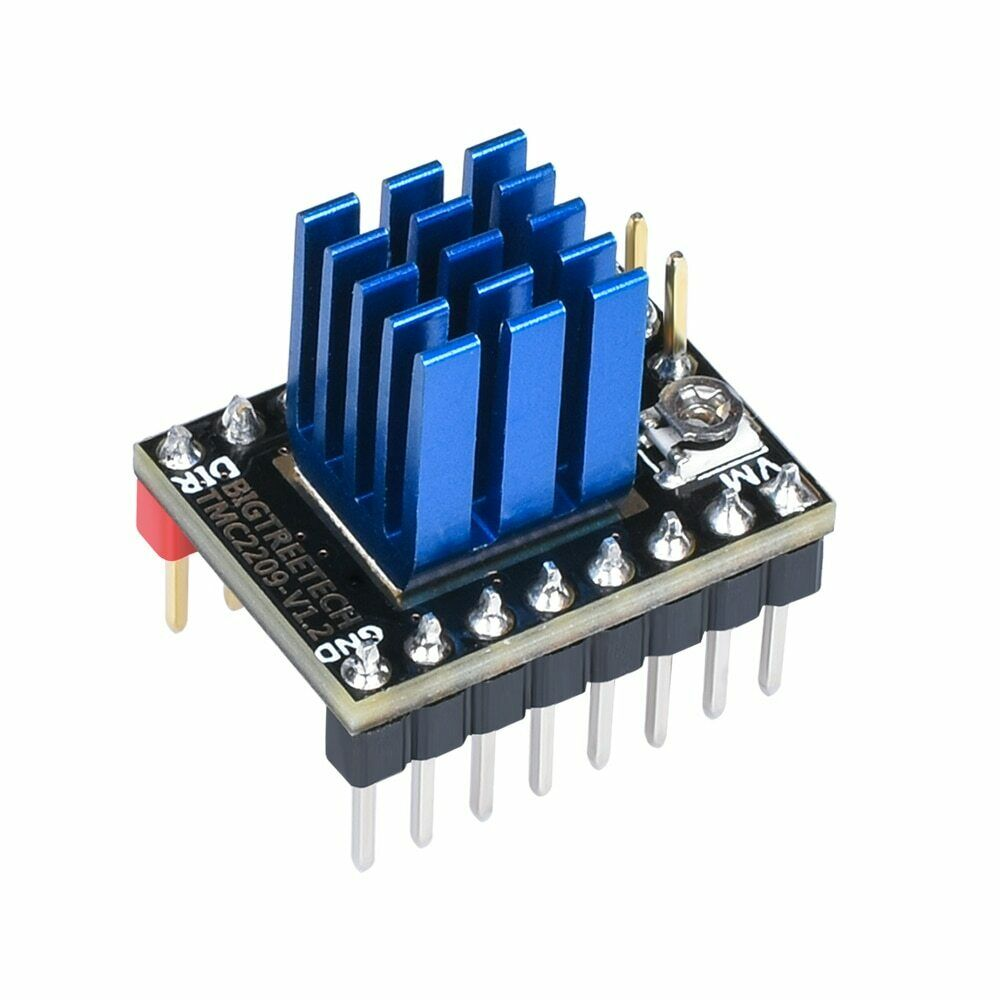
- BigTreeTech TMC2209's pre-soldered for single-wire UART mode four pack (that's how many you'll need for the QQ-S Pro) - https://www.amazon.com/BIGTREETECH-TMC2209-Stepper-Driver-Printer/dp/B08C2DJQ6B/
- Dupont Wire for cross connections - https://www.amazon.com/Elegoo-EL-CP-004-Multicolored-Breadboard-arduino/dp/B01EV70C78
- Heat Shrink Tubing
- Soldering Iron/Solder
- Wire cutters (the flush cut kind) - https://www.amazon.com/IGAN-170-Precision-Electronic-Strongest-Ultra-fine
- Wire strippers
- Tweezers/Hemostats to grasp the jumpers you'll be adjusting
Let's get to it!
- Remove power - do so at your own risk, I'm not responsible for any safety issues, etc. You are on your own here!
- Lay the printer on its side
- Remove the bottom electronics panel cover
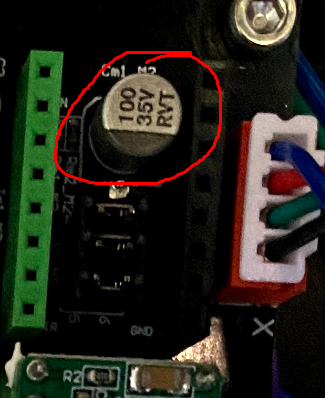
- If you're installing into theFLSUN HISPEED board, there's a capacitor in the way that WILL short out against the pins on the bottom of the TMC2209 board by BigTreeTech. Each manufacturer implements the 2209 differently so I am going to speak directly to that BTT board that I linked above since that's what I installed. If you do not plan on moving the drivers to another board (I do not), then cut the pins. Be sure to cut them as flush as possible so there's no chance of grounding them out. If you're uncomfortable with your cutting skills, you can always insulate the capacitor.
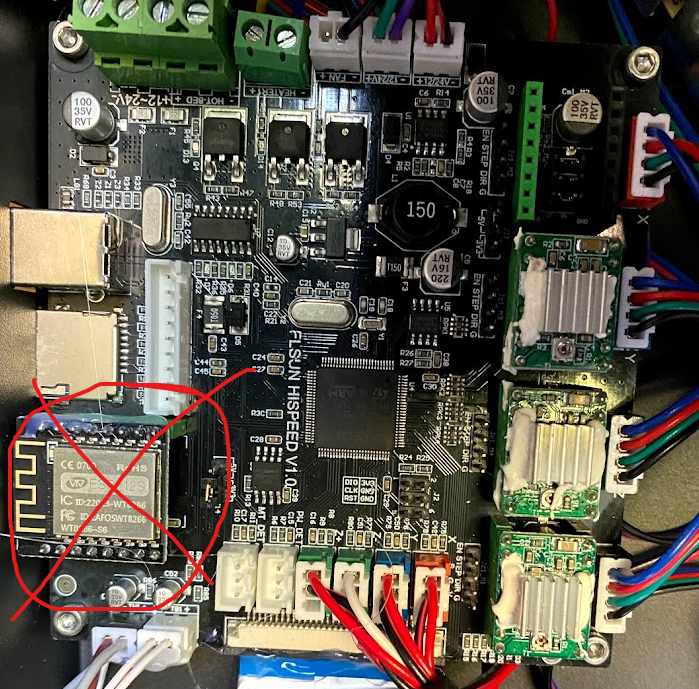
- Remove the WiFi Board. You will need this slot to communicate with the steppers via UART.
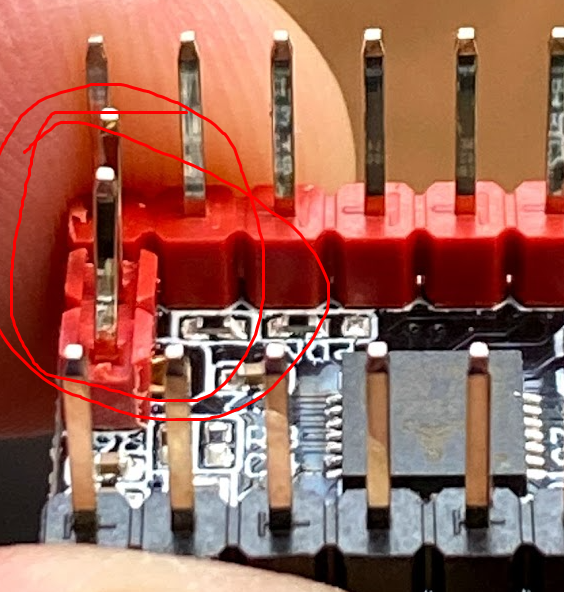
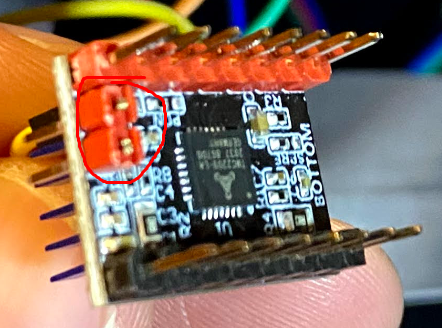
- The TMC2209 by BTT comes pre-soldered for single-wire operation. Single-wire operation means you will be using ONE wire to interface ALL of the steppers via UART with the MCU. In order to do this, you'll need to set an "address" to each of the steppers by setting the jumpers on the board (second image/diagram). The images are from Foxies CSTL Github, linked above.


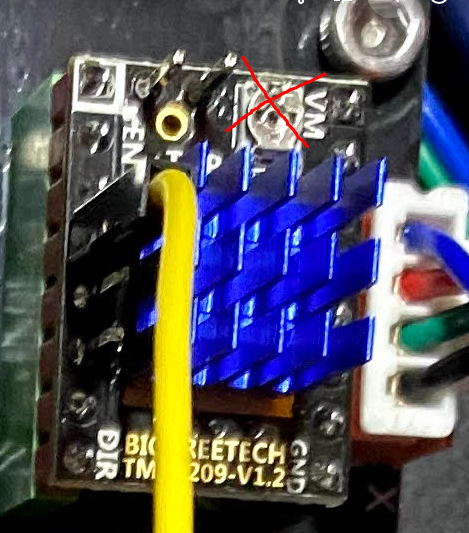
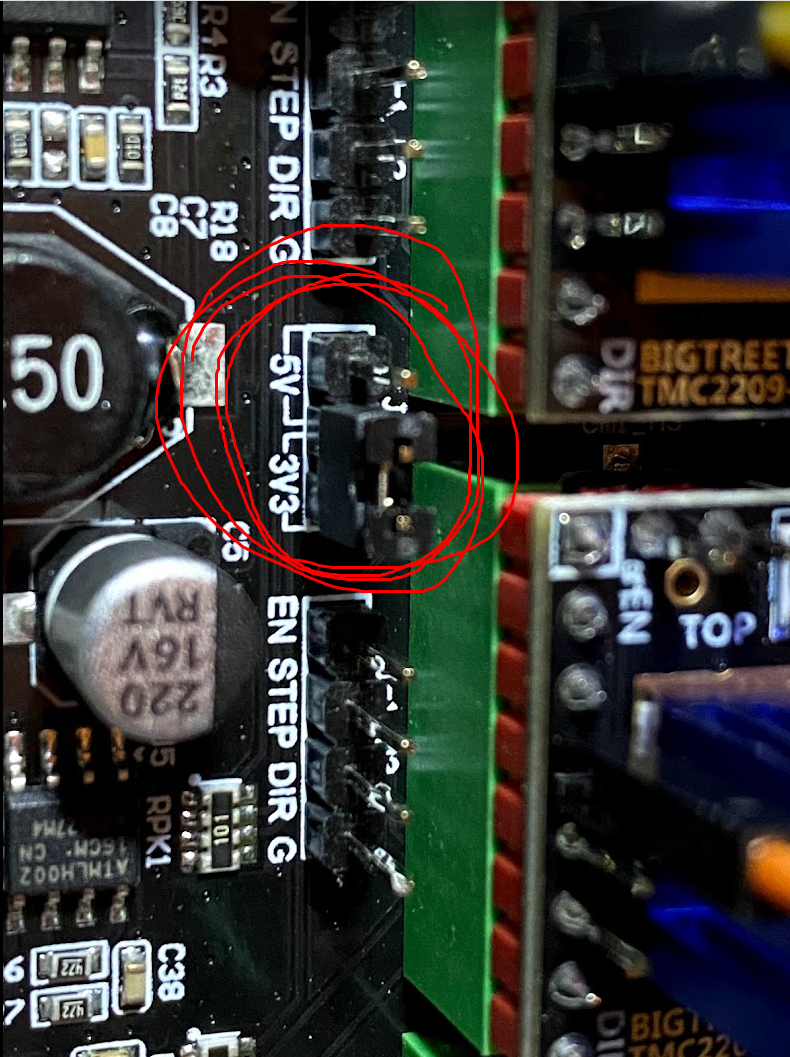
- Install the drivers on the board, on these particular ones, the red side plugs in to the green and the black to the black. While you're in there, switch the voltage on the stepper drivers from 5v to 3.3v. If you do not do so, you'll fry the WiFi interface/UART area.
- Using the Dupont cables, take two female to female and chop them in half. You'll have four female ends. Take one male to male and chop it in half. Take one male end and solder it to the four female ends, heat-shrink the junction and use it to connect pin four on the red side of the driver to the PA8 pin on the wifi module. Note, in the diagram, pins four and five show as connected. The BTT board has them already soldered together on the bottom of the board from the factory and they add pins on top of the board for easy hookup!

- You're done here, now it's time to dress any loose cables, close up the lid, and set the printer back upright.
- Power the printer on, wait for Klipper and your interface to load.
- DO NOT MOVE ANY MOTOR!!! The motors are reversed and they are not configured.
- Go to your printer.cfg and make the configuration modifications I'll discuss later. DO NOT GLOSS OVER THIS STEP OR YOU WILL BREAK THINGS!!!
- Save & Restart your printer.cfg file
- Run Delta Calibration
- Run Bed Mesh Calibration
- Calibrate your extruder e-steps (rotation distance)
- Enjoy the test print!
Klipper Configuration
In Klipper, you'll need to reverse the steppers. This is accomplished by adding an exclamation mark in front of the dir_pin parameter for each stepper:
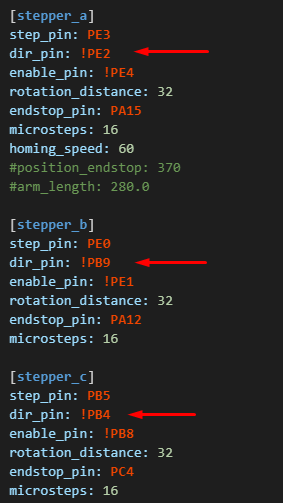
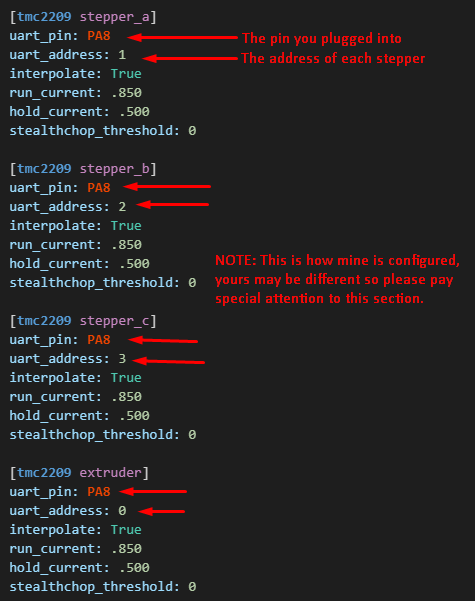
You will also need to add a configuration for each stepper to let Klipper know your stepper drivers are no longer garbage. You do this by adding a TMC2209 section for each stepper:
Warnings:
- I tested this by homing, first. When I saw the motors move the wrong way, I rapidly went for the EMERGENCY STOP button. I reversed the motors in the firmware and moved on the next warning.
- Check to ensure each tower is properly configured (uart_address matches what Klipper is expecting for stepper a, stepper b, and stepper c). This is easier on a cartesian because they're labeled X, Y, and Z on the board. To check each tower on my Delta, I homed the printer, brought the Z down about 100 mm to allow for some X/Y movement (all three towers should come down evenly), and then I moved positive 50 on the X axis. The movement was level and in the expected direction so I brought it back to center (X 0). I then moved positive 50 on the Y axis and, again, things moved as expected so we're good there.
- Do everything slowly and be ready to hit the EMERGENCY STOP button.
Conclusion
Your printer is now fast, quiet, and on steroids. The extruder is absolutely mental, try not to break filament with it. Print yourself a speedboat benchy and enjoy a beverage as the QQ-S with 2209s blows your mind.